Track Changes in Power BI: Part 3 - Workspace Mode
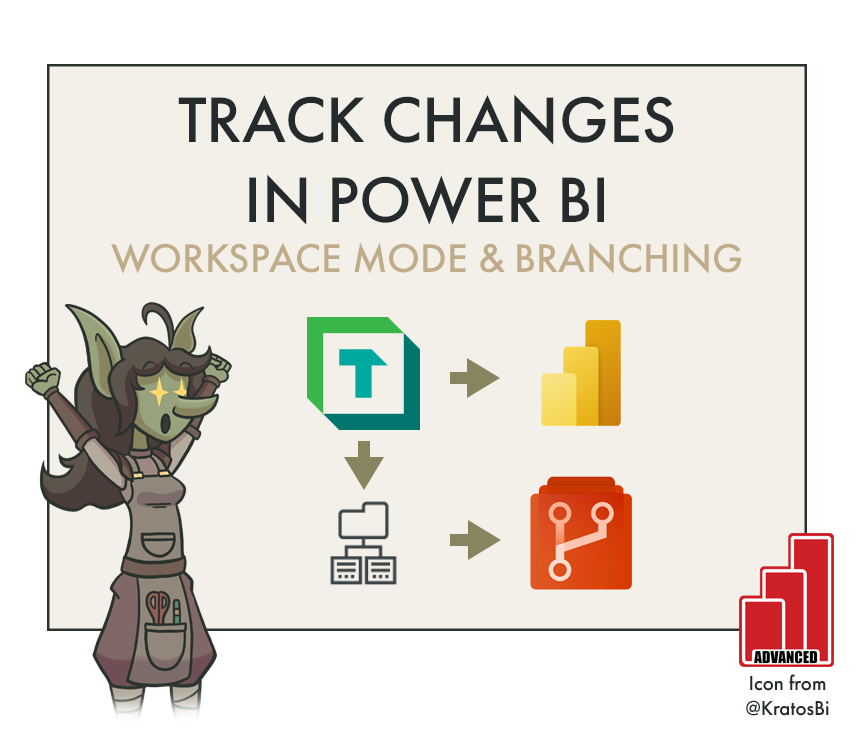
RAMP UP PRODUCTIVITY WITH WORKSPACE MODE
…and how to set up a branching strategy with Power BI Development
Take the next steps to facilitate a more robust source control management (SCM) process
CONTENTS
Part 1: Source Control in Power BI using Tabular Editor & DevOps
Part 2: Getting it done
Part 3: Next Steps
In the previous post, we learned:
How to create an Azure DevOps Repo for Power BI source control
How to clone the Repo using a Git (integrated) client like Visual Studio
How to save the TE folder structure to the Local Repo, and commit/push changes to the Remote Repo
How to use the TE folder structure for development in your new workflow
Next up: Find out how to make your workflow & collaboration more productive with Tabular Editor 3 (TE3) and Workspace Mode, then by incorporating a Branching Strategy in your SCM.
Save time with TE3 & Workspace Mode
Now you have set up a source control process for your Power BI dataset. Good job! If you’ve followed the previous two posts, you now:
Have a synchronized local & remote repository for storing files & tracking changes
Have saved your model metadata there using the Tabular Editor (TE) folder structure, to have granular source control on an object-by-object basis
Are continuing development in TE on the folder structure, deploying it to the Power BI service, when committing changes for testing.
There is one easy way that we can make this process more efficient. In Step 3, you need to save changes to the folder structure, then deploy the model to the Power BI service if you want to test your changes. This isn’t so convenient, because you need to do a full model refresh after the deployment. Smaller, iterative changes thus are not going to be very pragmatic in this workflow. Further, there are too many manual steps that we can streamline. Thankfully, Tabular Editor 3 has a great solution for this, called Workspace Mode.
If you have a TE3: Business or TE3: Enterprise license, it’s strongly recommended that you continue working in Workspace Mode when developing your model. This lets you simultaneously connect to the folder structure you and a dataset in the Power BI Service at the same time. There is thus no need to deploy & refresh your dataset; changes are saved simultaneously to the repo & QA dataset for faster testing, which you can also do straight from Tabular Editor 3 with Pivot Tables & DAX Queries! This is a tremendous time-saver.
Getting started with Workspace Mode
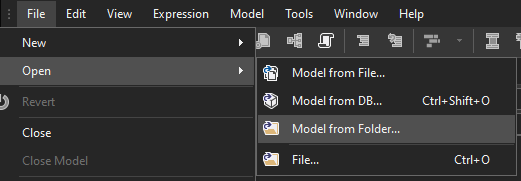
1. From TE3, connect your database.json & model folder structure
You will be prompted to open the model in Workspace mode.
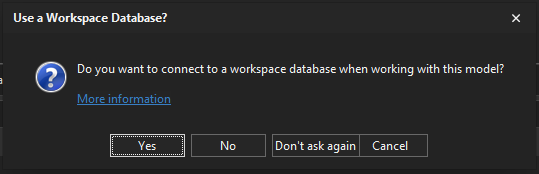
2. Accept the prompt to open the folder in Workspace Mode
3. Connect to a workspace via XMLA endpoint & select a name for your dataset
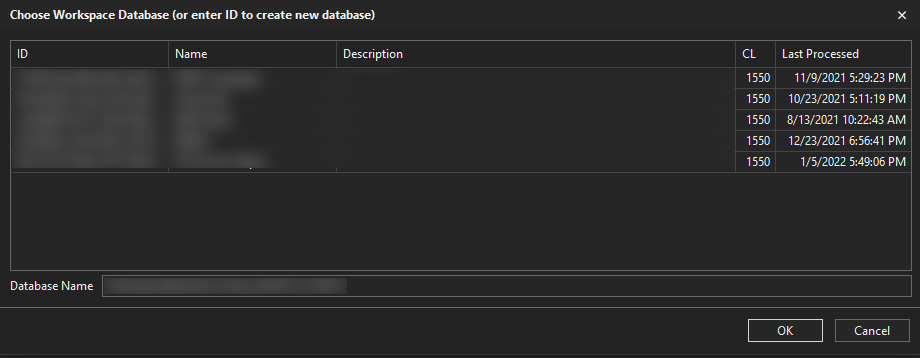
Choose a new Database Name or overwrite an existing one
If you need to overwrite an existing dataset, select the dataset / write the same name, and overwrite it. You will need to refresh all model tables, again - don’t forget to refresh tables that have scheduled refresh disabled in their properties, i.e. if they are static or helper tables. You can easily toggle a full refresh from TE3 TOM Explorer.
4. Henceforth, when you connect to the folder, you will do so in workspace mode
.tmuo file specifying workspace mode config - workspace connection string (XMLA) & DB name
A .tmuo file is created specifying the workspace & model name. This file will specify the instructions for which dataset in the Power BI capacity to connect to in Workspace Mode (if you have Premium, or otherwise in Azure AS, SSAS).
The Revised Workflow: Less steps with TE3 & Workspace Mode
A simple, sustainable process
Open Tabular Editor
Connect to the Folder in your local repo
Make & save changes in Tabular Editor
* Test changes in the QA data model:
Using data exploration & querying methods from Tabular Editor 3
and/or using DAX queries from DAX Studio
and/or using business reports linked to the QA dataset
and/or clicky-clicky-draggy-droppy ad hoc from Power BI Desktop or Analyze-in-Excel
With a custom, automated Build/Test solution using APIs
** Stage and commit changes from Visual Studio or another GIT tool (UI or programmatically)
** When approved (usually after a tester validates in #6), push changes to your remote GIT repo
** Push QA dataset changes to Production workspace, using your standard application lifecycle management (ALM) process:
ALM Toolkit
Deployment Pipelines
Programmatically with APIs
** Update Production app(s) where necessary
Notes:
* This can be automated with Azure DevOps integration or custom programmatic solutions, even when i.e. splitting datasets and reports across multiple deployment pipelines
* Integrate with your own SCM & CI/CD process with i.e. build, test & deployment integration/automation;
— this is just an example

But how can we work collaboratively on the same solution?
Next Step: Improve collaborative dataset development with Branching
What is Branching & Why is it Important
One of the powerful aspects of using a source control management (SCM) system is the ability to do what is called branching. Normally, when working on i.e. a .pbix from a shared drive, two developers cannot work on it at once without their changes disrupting one another. They would need to work on separate versions of the dataset or report, then manually consolidate changes. This is a painstaking process prone to human error and wasted time, even when leveraging external tools like copying/pasting in Tabular Editor (TE) or comparing model definitions and manually selecting then pushing changes from one to another in ALM Toolkit (ALM). There is also no documentation of the versions; eventually, changes feel ad hoc and chaotic, leading to confusion about who changed what, when.
Branching makes this easier by providing a framework for a structured process of parallel developments. Branching is the duplication of an object to allow a developer to work on it without affecting others, but importantly, this duplication and its changes are tracked as a lineage (a branch) inside in the SCM system. Changes (visualized as nodes in the below image) in the branch can be automatically merged to consolidate all developments. Conflicts in the merge - for example, if both developers change the same object in different ways - will be raised, blocking the merge until they are resolved.
As one can imagine, using branching to manage version control can provide an elegant way to manage the version control of a Power BI dataset, particularly when tracking changes of individual model objects, thanks to the Tabular Editor folder structure. It’s important to note, though, that there are many different branching strategies that exist. With all things SCM, the most important part is adopting a strategy best for your team, then ubiquitously & consistently sticking to it in your development process. The value comes when everyone is aligned with the process and strategy, and adopt it in their way of working.
Example of how SCM & branching facilitates collaborative development on a Power BI dataset
Example: Say a defect arises in a report on late orders. At the same time, a high-priority request comes in to incorporate aggregate information about Deliveries. To divide the work, Developers 1 & 2 have created two branches:
A bug branch: Where developer 2 will work on making the changes to fix the bug
A feature branch: Where developer 1 will add the Deliveries table, relationships & measures
Changes can then be merged according to the team’s branching strategy, tested, and eventually deployed to production.
Collaboratively Working in TE3 with Workspace Mode
Note for Workspace Mode users in Tabular Editor 3: A diligent eye might notice an issue: Developer 1 & 2 might have branches on the Repo, but this will have no effect on Tabular Editor or the dataset deployed in the Power BI service*. It is thus a good practice that each developer connecting in Workspace Mode use their own deployed dataset to test changes. For other non-Workspace Mode users should similarly deploy their own specific dataset to test changes. This can be made smarter using automated CI/CD with Azure DevOps & Power BI integration, also outlined in brief, below:
*In Azure DevOps, you can create Automation Pipelines that leverage the Power BI APIs to perform downstream actions in response to new branches. For example, when a new branch is detected in the Remote Repo, this could trigger:
1. A re-named copy (branch) of the dataset to be deployed to the Power BI Service
2. A modification to the .tmuo file in the new branch, pointing to this new dataset for workspace mode
This would ensure that the developer working in the branch can continue to use Workspace Mode to easily test their changes in a deployed branch dataset. Later, when merging the branch, other pipelines can then handle the dataset appropriately, deleting it to clean up the QA Workspace. This CI/CD integration between Azure DevOps & Power BI can create extremely effective workflows.
A conceptual framework for automated CI/CD using Tabular Editor 3, Azure DevOps & Power BI

Tabular Editor 3 + Azure DevOps + Power BI!
A powerful combination of tools can really accelerate productivity & streamline workflows
A quick tutorial on Branching
15. Getting started - creating a branch in Visual Studio
I’ll be brief in my explanations, here, since this is a tutorial focused on Tabular Editor. To get started, you should first read about the different branching strategies, to know when you should create a new branch, from which branch you should base it on, and how you should merge.
First, you need to create a new branch from within Visual Studio, or whatever Git client you are using.

Select ‘New Branch’

Give the branch a descriptive name, and base it on the latest branch appropriately
16. Continue working in the branch
Make the development changes or additions and perform the commits appropriately, using a descriptive message.
17. Merge with another branch following your branching strategy
Right-click on the branch in order to merge the changes to another. In the below demo example, the Bugfix changes & Feature changes were merged before merging into the parent ‘main’ branch for testing.
Clicking on each node, you can inspect the changes committed at that specific point in the branch lineage.
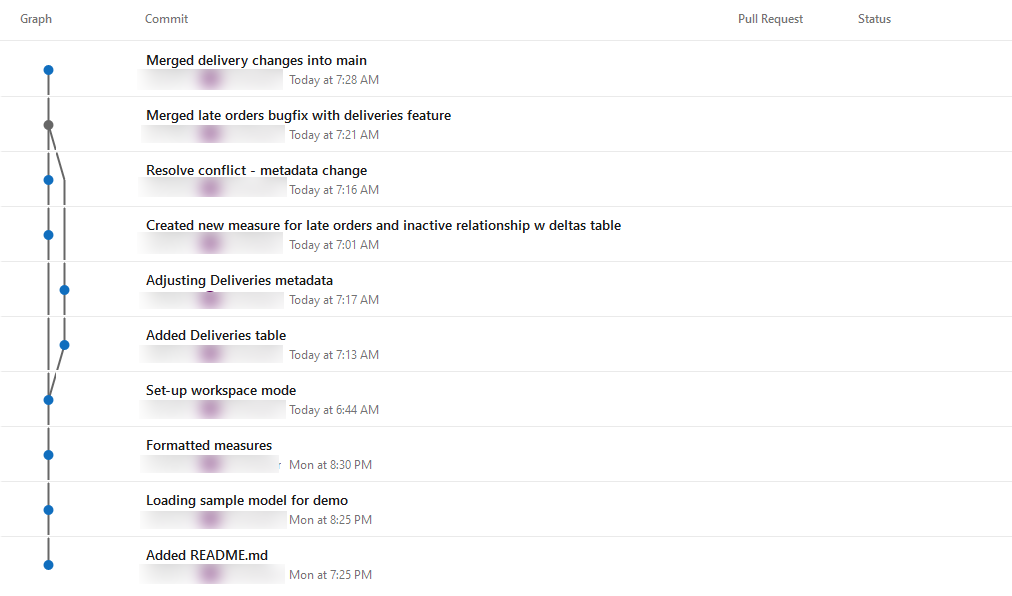
View of the branches and merging from DevOps Repo
The ‘Features_Deliveries’ branch added deliveries information
The ‘Bugfix_LateOrders’ branch added and changed DAX & model relationships, unrelated to deliveries
You’re all set! You’ve now setup SCM for your Power BI dataset and can track changes of each individual object in the model. But don’t forget, for this to bring value…