How to create an Azure DevOps Repo using Git & Visual Studio
GET STARTED WITH VERSION CONTROL
…using Azure DevOps Repos
This article is part of a larger post
How to Track Changes in Power BI - Part 2: Tutorial
CREATING YOUR FIRST REPO
If you don’t have an existing Repo / haven’t used Git before
1 . Sign up for a DevOps trial if you aren’t using it, already.
Go to https://devops.azure.com/ and either sign in with your organizational account if you have DevOps, or start a trail if you don’t. Check with your IT administrator before starting any trials ;)
2 . Create a new project if you don’t want to use an existing one that you have access to
3 . Create a new repo
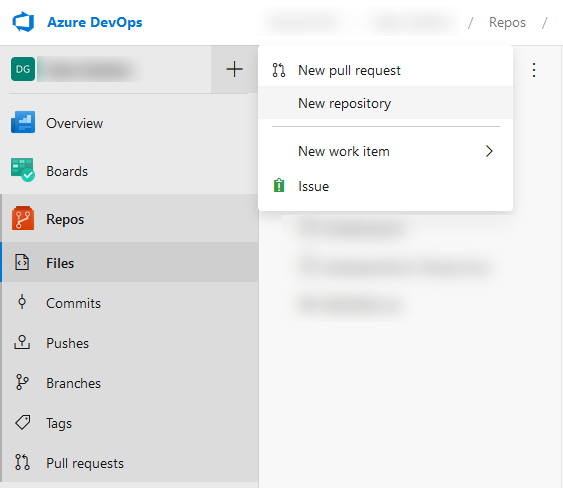
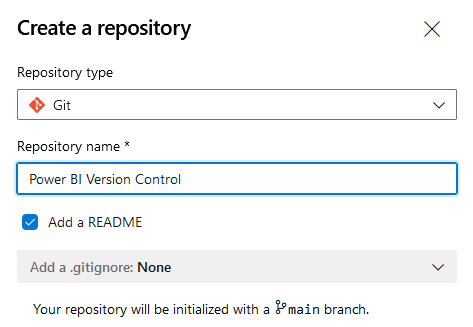
If you aren’t already using a source control system, now is a good time for you to experiment with one. In Azure DevOps, navigate to Repos and create a repository called “Power BI Version Control”.
Click Repos > + > New repository
Create a Git repository named how you like
4. Download & install the tools needed to work with a local copy (‘clone’) of your Repo
Visual Studio (Community)
You can use other tools as well, like Azure Data Studio, or other Git GUIs
5. Open visual studio & clone the repository
You can enter the URL of the remote repository location. The path where the local clone will be created will automatically be updated. You can edit this manually to another directory, if desired.
Clone the repo using Visual Studio
In the DevOps repo, select “Clone”
Copy the URL to Visual Studio and select “clone”
Paste the URL into the appropriate place in visual studio
You’re set! You can familiarize yourself with the UI of Visual Studio. Maybe try creating a file in Notepad called ‘HelloWorld.txt’ and place it in your Repo. If everything worked as expected, you should see it come up in Visual Studio marked with ‘U’ - meaning that it’s a new addition.


